
Step-By-Step: How to Use Disney Cruise Line Navigator on Board
The Disney Cruise Line Navigator App is essential when you’re on board the ship, as there is no paper listing of daily events. Want to know where you’re having dinner? The app. What the schedule is in the movie theater? The app. Need to contact your teenagers and tell them you’ll be in the Rainforest Room? The app.
Since you can’t take a spin through the on-board version until you’re, well, on board, take a spin through the overview below. We’ll start at the basics and finish with some pro tips that might leave even your tech-savvy kids asking “Whoa, how did you do that?” By the time you sail, you’ll be an old hand at finding the information you want fast. (Last updated/republished May 21, 2024.)
Tap any heading below to go directly to that section, and click on any image to enlarge it.
Getting Connected
Getting Oriented
Making Plans – Where to Find What
Dining Information in DCL Navigator
Using the DCL Navigator Chat
Miscellaneous
Getting Connected
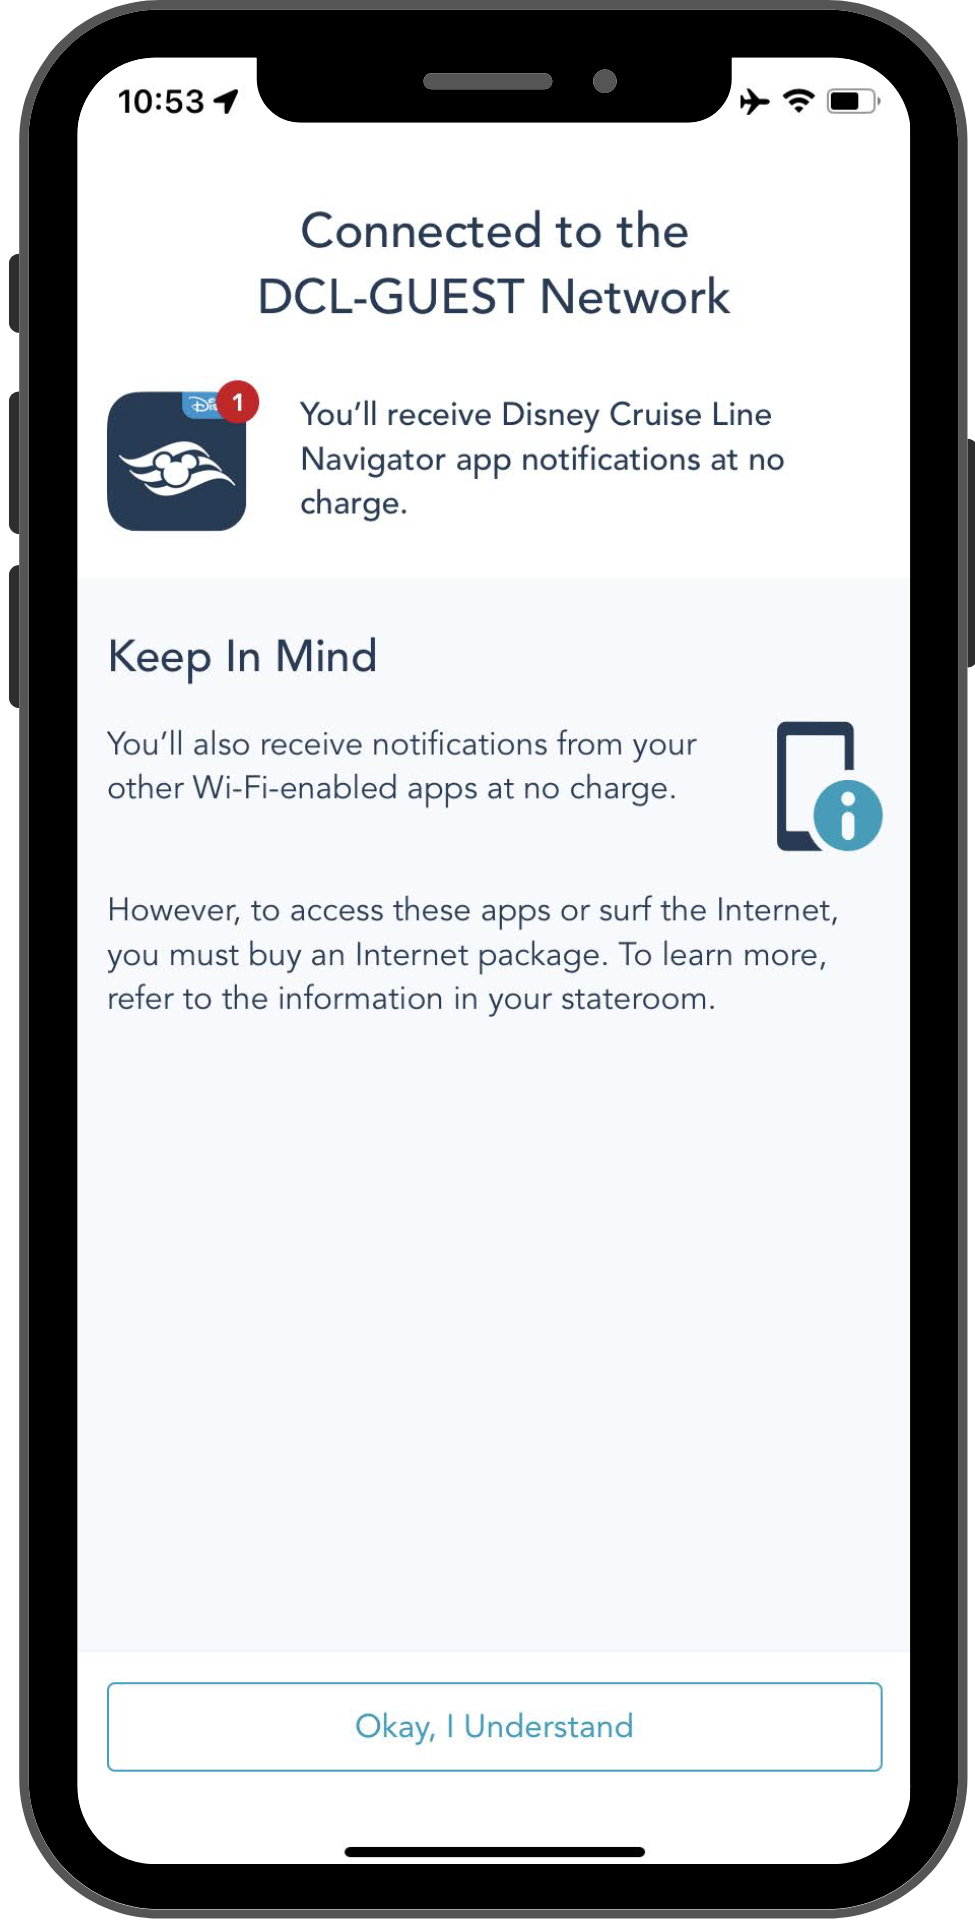
If you run the app at home before your cruise, it works like an app version of the Disney Cruise Line website. But once you get on board, you’ll see a whole new look. In order to access the onboard version of the app, you must be connected to the DCL Guest Wifi, available on the ship. It is free to connect and you do not need to buy an internet package to use the app or any of its features.
On land, you log in to the app with the same credentials you use on the Disney Cruise Line website, but on board, you won’t log in at all. Instead, you’ll link your stateroom. This allows everyone in your group to use the app whether they have a website login or not. The steps below may vary a bit, but the screenshots should be typical. Once you’re connected to DCL Guest WiFi, open the app, tap “Link Your Stateroom”, and follow the prompts.


Although the text says to link your stateroom, you’re really setting up the app for an individual user. If you and your partner (or kids) link to the same stateroom number, you’ll have different chat IDs based on the personal information you gave.
Did one of your kids accidentally link on their phone using your info, and now their phone thinks they’re you in the chat? No worries — look on the bottom right for “More” and select it, then choose “Help”, then “About this app”. You’ll see a link to reset the app, after which you can relink it correctly.
Getting Oriented
When you first open the app, you’ll be on the Home Screen. How do you know it’s the Home Screen? On the bottom of the screen is a menu bar; the icons light up to indicate which area you’re currently using. If you’ve used any of Disney’s parks apps such as My Disney Experience or the Disneyland app, this interface will feel a little familiar. Here’s what you’ll find when tapping any of these icons:

- Home: rapid access to the first few items in your plans, plus the day’s itinerary information for the ship
- Explore: all the available activities — if it’s on the ship’s activity schedule, you’ll find it here, plus shopping and more
- Add Plans: The big plus sign is a shortcut to activities you need to pre-book.
- My Plans: This is the full blow-by-blow of everything in — you guessed it — your plans. See your whole trip in one place.
- More: Access to a variety of miscellaneous features: view your bill, muster information, etc.


Making Plans – Where to Find What
Today’s Ship Information
Clicking Today’s Itinerary on the Home Screen gives you the big picture – weather, what the ship is doing that day, etc. If it’s a port day this is where you’ll find the All Ashore and All Aboard times, as well as information about Emergency Contacts and the Ship’s Agent if you have a problem when you’re ashore. If you’re going ashore, I recommend taking a screenshot of the Contact Information screen to guarantee you have access to these numbers no matter what the internet situation is.


Find Your Plans Under “My Plans”
The “My Plans” screen is the way to see all of your plans for the day (or for other days), and you’ll get notifications 15 minutes in advance for anything that’s in “My Plans”. When you first board, you’ll see three kinds of activities in pre-loaded into this screen.
- You’ll always see your assigned dining rotation for the day.
- You’ll see anything you pre-booked or reserved such as specialty dining or port adventures.
- “Signature Events” – usually the ship’s evening stage shows – will be added automatically, but can be removed if you don’t want to include them.
The rest of the ship’s daily activities – crafts, trivia, etc. – will be found in the Explore screen. Tap the heart to add any activity so that it appears in the Your Plans tab. Want to take it off later when reviewing your plans? Just tap again to unselect it. These favorites are specific to you, so if some family members are excited about the midnight movie and others are more interested in Rise ‘n’ Shine Yoga, everyone will see only the things they’ve added.


Activities – the Explore Screen
If you want to go beyond the activities that are automatically added to your plans, you’ll want to head to the Explore tab. Disney has worked hard to expose a lot of information in this screen so don’t be afraid to tap, tap, tap. Want to see movie schedules? There are at least four different ways to access them. When you first open the Explore tab, there are a few settings that you’ll want to be aware of.

- Tapping the Date allows you to switch and see activities for a different day.
- The Filter lets you select activities based on specific criteria like age range or activity type.
- The left-right slider that starts with “Daily Activities” lets you quickly move back and forth between categories
- The little ship on the top left can be used to access deck plans.
For more on how to get the most out of the Explore screen and easily plan your day’s activities, see Plan Your Day With the Disney Cruise Line Navigator App.
Dining
Dining information is found all over the app. On the Explore tab, the Dining & Lounges slider section shows you hours for all the dining venues. You can see which rotational restaurant is serving lunch, and what time Cabanas is open. Clicking any eatery brings up the menu. Just for you, you can see your rotational dining assignment on the Home screen or the My Plans tab, and you can click to bring up the menu. Want to see your dining schedule for the whole cruise? You’ll find that on the More tab.


Chat

The chat feature of the Navigator app is accessed by tapping the little chat bubble that is visible on many (but not all) screens. If you have new messages, the bubble will have a red dot and a number to show how many new messages you have. The chat bubble will only show when you’re scrolled all the way to the top of the screen.
If you’ve texted on your phone before, you can use the chat in the Navigator, but there are a few things that are worth a callout. First, people in your cabin will automatically be shown in your chat list. Want to talk to anyone else? You’ll need to supply them with your Chat ID, visible above your name, in order to get the conversation going.


⭐ You can click the little pencil to the right of your name to change how it is shown in chat, to you and your chat partners. Having your kids change their screen names can be a good way to keep some privacy for your family as they accumulate a long list of chat friends in Edge and Vibe. (Changes are retroactive). Even if you don’t care about privacy, you can still count coup on your kids by changing screen name before they do theirs. Who says parents can’t be tech-savvy?
⭐ To get alerts when someone messages you, make sure that your phone is set to allow notifications from the app. But this still doesn’t always work properly. If you’re waiting for a message, you might want to launch the app and check every now and then.
⭐ Swiping left on a chat thread offers options for blocking contacts or leaving the chat, depending on whether it’s an individual or group thread. You can also clear the previous messages, or get more details about participants.
⭐ If you had a pop-up message when you first opened Navigator for the day and dismissed it, you can still find it here by switching from Conversations to Notifications.
Miscellaneous
Here’s a quick list of where to find …
- Your account balance: More tab, then My Charges (you can also download a copy of your Folio online after your cruise).
- Change your purchasing pin: More tab, then My Account; you may need to visit Guest Services to do this in person
- Book a placeholder cruise: you can do this two ways (because Disney is always happy to take your booking for a future cruise). Either begin from the Home screen, just under the ship image, or from the More screen: 10% off a future cruise.
- Weather: Tap Today’s Itinerary from the Home Screen
- Your full dining rotation: More screen, then Dining Schedule
- Your muster station: More screen, then Emergency Assembly Station; you can also find this on your Key to the World card.
First published July 5, 2022

You May Also Like...
-

When you book a Disney Cruise Line sailing, you'll get lots of emails - receipts, reminders, and promotional materials. You'll also…
-
Using a mobile app to find cruise activities makes it difficult to get away from your phone on vacation. Never fear,…
What an amazing resource. I’m truly grateful! This will be our inaugural Disney Cruise Line vacation, and I can’t wait to wow the kids.
What a fantastic tool, I really appreciate it, Jennifer. This will be our first Disney Cruise Line vacation, so I’m looking forward to impressing the kids.
Jennifer Heymont, thank you for the information. While onboard, is there the best way to record the DCL Navigator pages for each day? Is there a way for DCL Guest Services to print the same information? I’ve seen another website called disney cruise blog post hard copies and phone-recorded copies of the ship’s daily navigators. I prefer reading their hard copy. Any suggestions?
Hi Ray, the printed Navigators that you’ve seen copies of on other blogs had already started to be phased out before COVID; they were still available on request but no longer delivered automatically. When sailings returned after a year+ hiatus during COVID, printed Navigators were not offered at all. As recently as September of last year, Disney’s official answer is that there is no printed schedule and you should use the app. (https://plandisney.disney.go.com/question/hard-copies-daily-navigator-brought-back-found-app-518562/). But I have heard that guests are sometimes able to have Guest Services print out a schedule for them. This may depend on how busy they are, etc., etc. – your mileage may vary.
One thing I can suggest: when we sailed with a printed Navigator we never carried it with us, just used it in the room to plan our day. That’s actually one thing I prefer with the app, that I can always have it with me without “taking it away” from anyone else in my family who might want to use it. If you’re comfortable in this “room only resource” mode and you have an iPad or other tablet, the app displays a lot more information per screen on those devices (just because they’re larger) and sometimes it’s easier to use. The downside is that you can only be logged in on one device at a time; if you sign in to the app on an iPad it will log you out on the phone – or at least, that’s what happened to me when I tried it.
What an awesome resource, thank you Jennifer! First time DCL cruising family and I love the idea of showing off to the kids when we get on board, LOL.
Just a question – can we view our photos taken on the app too? For the package?
Hi Melissa, here’s hoping your kids are suitably impressed! 🙂
To answer your question, no – at least not when I was last on board. I’m not sure when your cruise is, but our cruise expert Erin may have an article coming out in the next few months on what you need to know about the DCL onboard photos. Whether or not you see it before you go, have a great trip!
Is it possible to use the app without paying for any internet service at all and yet have access to all of its features?
Hello, you’ll be connected to the DCL Guest WiFi, which is like a little mini-network that belongs to the ship. The WiFi network can connect to the internet, but you don’t need to. The app runs on the WiFi, which means that you don’t need to access the internet to use it, and as far as I’m aware there are no paid features in the app. Once you’ve paid to get on the ship, you’re good to go!
Can you access all of the app features without paying for any internet?
Hi Laura – yes, you can. I’ll put that in the post, actually, thanks for flagging that!