Foto Fridays: Disney Point & Shoot Photography 101(B)
Welcome back to Point & Shoot 101. If you were absent for the first installment, go back and read it here. Also, your grade will be reduced by a half-letter for each subsequent absence you have. Don’t say you weren’t warned. Here in our second installment, I’ll be discussing night photography. For the unassimilated, night photography is often considered the most daunting type of photography. Questions on how to take sharp night photos are some of the most frequent ones I receive, but really, the secret is quite simple. Hopefully I am not banished from the Alliance of Photographers for revealing our secrets.
The first secret is using something to stabilize the camera. There is no way around this one. If you’re holding your point and shoot camera at night while taking pictures, invariably you will end up with blurry photos. This doesn’t mean you need to bring a dedicated tripod into the park (with the small size of some expandable travel tripods, I’d recommend it if you’re at all desirous of nice photos, but it’s not an essential–I will make the tripod pitch later), but you need to use something.
If you don’t opt for a fully expandable tripod, I would recommend bringing one of those mini GorillaPod type devices that has legs that can be bent around various objects. This little device can fit inside cargo shorts, a purse, or if you’re into hip fashion trends, can likely be worn as a bracelet. Hey, it’s better than those stupid Silly Bandz things.
Alternatively, you can bring a beanbag or something similarly malleable to stabilize the camera on uneven surfaces. If you opt for none of these devices, the infamous “Trash Can Alley” on Main Street works well for stabilizing cameras. Obviously you won’t be setting either the beanbag or the Gorillapod on the ground (most of the time), unless your ultimate goal is getting your camera crushed, so you will still need to find another object to give you the height necessary for photographing. Most of the time, this will mean using a trash can, too, but trees and benches also suffice.
Like I said above, my recommendation would be for a full size travel-tripod. This is especially the case if you already have a bag that you carry into the park. My tripod brand of choice, Velbon (I use the Luxi F for those curious), makes a great travel-tripod, the Maxi L. This tripod weighs two pounds, is 60 inches tall, and can fold down to 14 inches. For those unfamiliar with tripods, those are some crazy stats. Seriously, it’s like the LeBron James (or Calvin Johnson, for fellow Detroit Lions fans) of travel tripods. The benefit of a travel tripod over the other options is that you can set up shop wherever. With a gorillapod, beanbag, or trash can, you can’t photograph the fireworks (very well, at least), and you’re constrained to areas where either trash cans are located, or some other object is located.
For me, a tripod is essential not because of this constraint, but because it allows me to get shots with both my wife and me in the frame. It’s not that I don’t trust having a point and shoot “unattended” five or ten feet away from me on a trash can, it’s that a lot of people in Walt Disney World are absolutely oblivious to their surroundings, and will “use” the trash can while you’re using it as a stabilization device. This vibration causes blurriness in the shot.
Since I’m spending entirely too long discussing stabilization (the preceding paragraphs could have been reduced to a single sentence that read, “you must stabilize your camera somehow for quality night shots; a tripod is the absolute best method, but there are other options you may consider exploring”), this vibration point makes a good segue. The second cause of blurriness results from vibration of the camera (although I suppose, hand-holding the camera is a form of vibration–but I’m referring to something different here). This vibration typically occurs when photographers who otherwise have their cameras stabilized press the shutter release button to take the photo. Even though it may seem like you’re only moving the camera a little, a little goes a long ways. To avoid this, use a remote (probably not an option for most point and shoot users), or use the camera’s self timer.
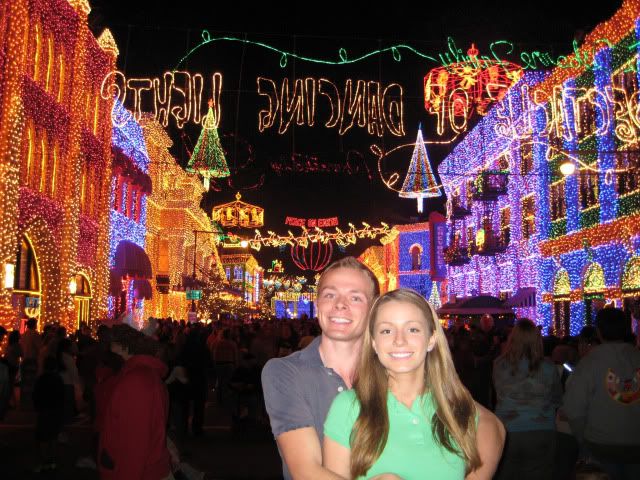
For static shots without people in them, a 1 or 2 second self-timer should suffice. If you’re intending to “do the self-timer dash” to get yourself in the shot, set the 10 second self timer. I like to set the self timer so that it takes three shots in succession of one another (most, if not all cameras have this option). Then Sarah and I quickly change poses between the shots. The end result is sort of like one of those novelty photo booths you see in malls and at weddings. It’s dorky, yes, but it’s fun, and isn’t that what WDW is all about? Another reason taking multiple photos here might be useful is because the shutter is open slightly longer than normal to allow more nighttime ambient light into the camera. Because of this, slight movements by the people in your shot can cause them to be less-than-tack-sharp. The flash usually freezes the action, but as a safe practice, it’s good to take multiple shots.
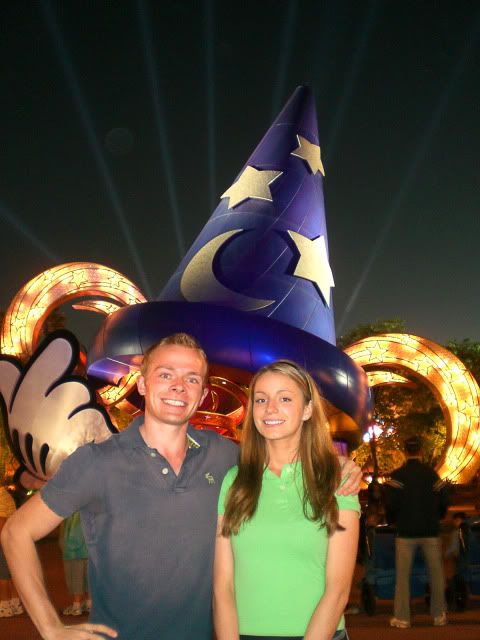
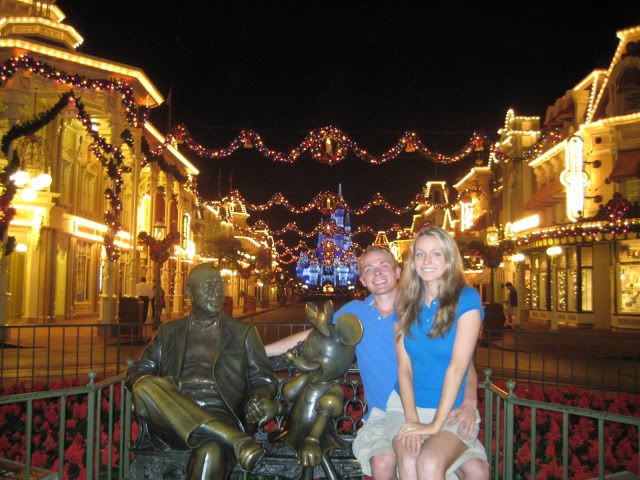
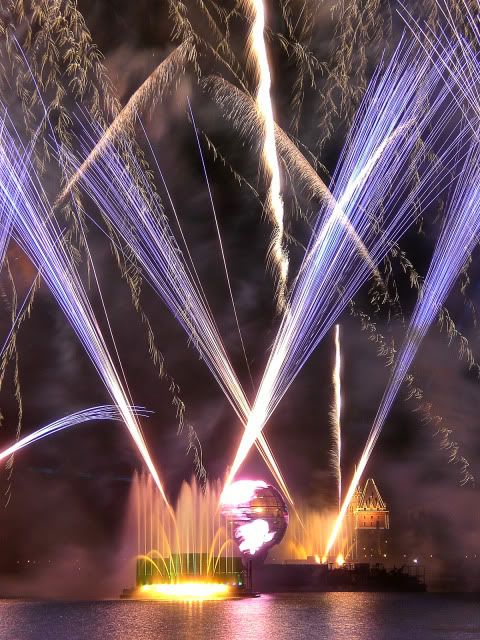
If you have a point and shoot with auto scene modes, the above two pieces of information are seriously the most important aspects of night photography. It’s honestly that simple. Some other information is useful as well, though. First, what scene mode to use (assuming your camera has them). If the shot is going to have your family or group in it, use Night/Dusk Portrait (or some variant of that language). What this will do is use a slightly faster shutter speed, higher ISO, and flash. If you just want to capture a static shot (no members of your party are in the frame–intentionally, at least), use Night Landscape. If you’re photographing fireworks, use Fireworks mode; if your camera doesn’t have that mode, use Night Landscape. Again, these mode names will vary depending on the manufacturer, so choose a close variant of the names I’ve listed if they aren’t exactly the same. Of important note is that neither of the last two modes mentioned should use the flash. If they do, turn it off or switch to a different mode!
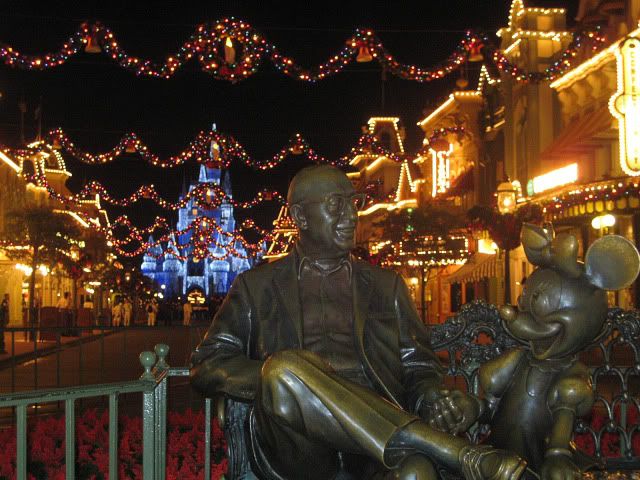
To that point, I suppose there is another important rule here: do not use your flash for night shots if your party is not in them! The tiny flash on your camera will not illuminate a Castle that is 50 or more feet away! It will only end up making your shots look worse. Turn off the flash at night. It’s the cool thing to do.
I don’t want to get into intermediate techniques too much on here, but if you do have some manual settings on your camera, it might behoove you to choose “shutter priority” (“Tv” on Canon and “S” on Nikon) mode for night shots if you want them sans people, and there are people around. Then, choose a longer shutter speed duration, say in the neighborhood of 10 seconds or more. This will cause people who are moving in the frame to ‘ghost’ out of it due to the long duration.
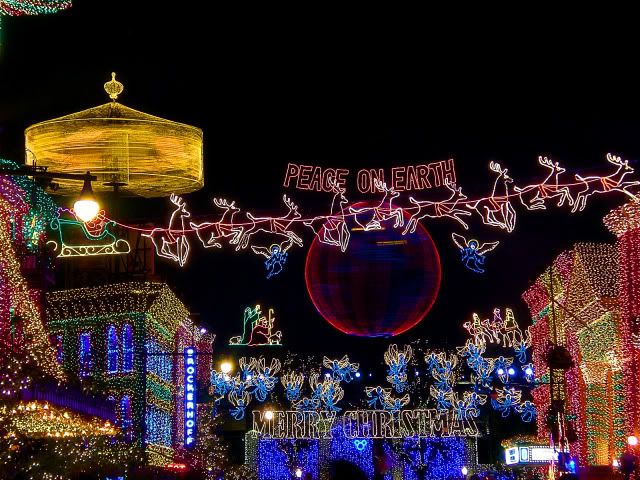
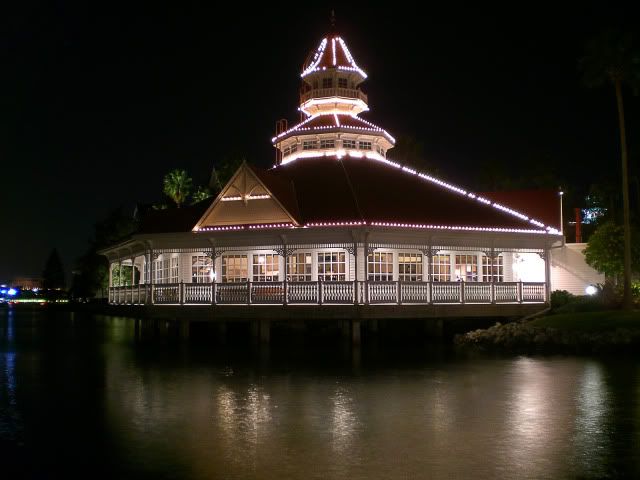
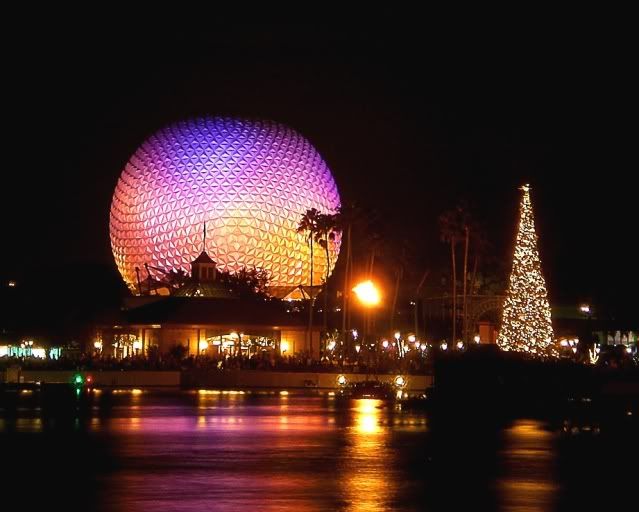
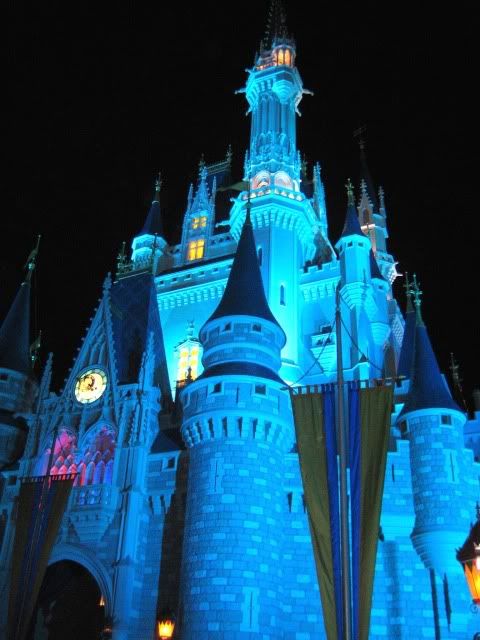
Although I mentioned it in the previous class in this course, I want to post another reminder that all of the images here were taken a few years ago by me, before I “got into” photography, with a $100 point and shoot camera. I have purposely used these shots to illustrate the results you can realistically expect to achieve by utilizing these methods with your camera. There are probably very few people reading this who will be using a “lower quality” camera than the one I used to take these photos, so if you follow these methods, you should have no problem achieving similar shots. Regardless of camera, the old adage certainly rings true that good photography is much more about the 12 inches behind the camera rather than the camera itself, so learning these techniques certainly could prove invaluable.
Don’t let the learning stop when you “leave” this class. Good photography grows from practice, reading, and the resulting knowledge that you gain from said practice and reading. If you’re interested in learning more about night photography, there is a wealth of online articles, as well as books, on the subject. Just Google “Night Photography Tutorials” to find a few. One site that I highly recommend, WDWPhotography.com, posts multiple articles per week written by Walt Disney World photography enthusiasts. Even if you’re not interested in learning advanced techniques, it’s fun to see shots from some of the incredibly talented photographers there, and read posts that site describe their creative process.
Another thing is to become active in online photo sharing sites such as Flickr. The TouringPlans group is a great place to share your pictures and find like-minded photographers who can provide constructive criticism and feedback.
Have any questions, topic requests, or tips of your own? Share in the comments!
You May Also Like...
-

The Disney Skyliner has been a frequent conversation starter ever since it was announced back at the last D23 Expo. Love…
-

If you have a little mouseketeer, one on the way, or know someone who does, you might want to check out…
-

If you haven't quite pulled the trigger on Disney+ yet (I mean, for those of us reading this blog, how many…
-

Novelty socks haven't always ranked at the top of my must-have merchandise list. But, this impulse purchase is getting harder for…
I agree with what the guy a few posts up said. This is a wonderful blog and Im glad youre sharing this information with the rest of us.
Thanks so much for this tutorial! It comes just in time as we plan our first trip with 2 sons (4 and 5) in January. This post specifically is great for me since at that time of year there will be more night and we’ll arrive on the tail end of holiday decor so I hope to get some good shots of that too.
I appreciate your noting that I don’t have to have a fancy camera, I simply can’t afford this year, to end up with some great shots.
My husband and I agreed Disney was our present to each other this Christmas … but I bet Santa can fit a Gorillapod into my stocking :0!
Yay, a fellow Detroit Lions fan!
Another tough loss this weekend. So much talent on that team but so many bad breaks.
Sadly it’s the typical story for the Lions.
Enjoying these posts! Will have to suck it up and buy a tripod before our next trip in February.
A tripod is probably the best investment anyone who wants to take good pictures can make!
Thanks for the great tutorial Tom! You have so much useful information that I can’t wait to put into practice in December! (In KC we also have the Plaza Lights, and I think this article will help me quite a bit with those pics, too.)
I have a question for you: I have been thinking about investing in a DSLR camera. I am currently frustrated by the lag time in my point and shoot, as I have a 5yo who is much faster than my current camera. (A Canon SD990is which I chose for its screen free quickshot mode.) I am “ok” with my point and shoot as far as photog skills go, and do not want to be overwhelmed by a DSLR. Is there a particular DSLR you might recommend for me to try? I’m not as much interested in cost as I am ease of use and friendliness for novices. I will read the manual, but don’t want to be overwhelmed. Thoughts?
Also, I am really looking forward to that Christmas tutorial! Another how-to article I would like to see is one in which you talk about some ways to get those fun shots like the one of you in Space Mountain, etc. A list of ideas on where to get fun shots, and how would be much appreciated. Thanks for everything!
I am a Nikon man, but I will readily admit that Canon makes good cameras as well. Either brand’s entry level camera should be good for you. If you’re interested in video as well, you can’t beat the Nikon D3100 right now. If you’re not interested in video, the Canon Xs or XSi might be sufficient (or the Nikon D3000).
I will add “interesting shots” to the list of future blog posts, thanks!
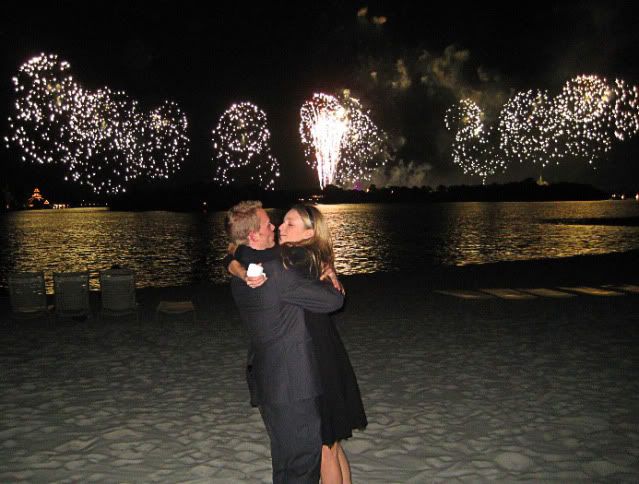
Thanks for the great tips! I <3 your proposal pictures so much. I desperately needed my GorillaPod for Wishes pics from the Rose Garden, but alas I left it at home last time.
Thanks! The proposal picture (me in a suit and Sarah in a dress on the beach) actually breaks the rule of ‘no flash during fireworks.’ But when you’re able to get fireworks portraits (probably not going to happen on Main Strret!), you do want to use the flash.
Tom, have you ever trien an Xshot for pics of you and your wife?
We have contemplated buying an Xshot (for those unfamilar, it’s basically a large pole you can use to hold the camera a distance from you for self portraits). Since I got into photography, we’ve actually been using a fisheye lens (with us centered to avoid distortion) quite successfully. It’s difficult to use a DSLR on an Xshot.
Great tips Tom! I’m hoping during Reunion you can show me how to take awesome pics of Osborne Lights with my camera #LetTomDoIt
Definitely! Also, I’ll be posting a Christmas photography tutorial here on November 26th (just in time for Reunion!) with a lengthy section on Osborne Lights.
Fact: I have used Minnie’s bow to stabilize my Gorillapod for Wishes fireworks. Worked like a charm. 🙂
I’ve seen people get creative with the Gorillapods, as well. If you’re not willing to carry a tripod and want to take night photos, they really are a great device. At only around ~$10-20, they give a lot of ‘bang for your buck.’